Minimalist yoga | How to learn the basics and do yoga independently for free
Yoga is one of the most important things you can do for the balance of your body mind and soul. It’s also one of the most minimalist forms of stretching and exercise tools that exists.
This is probably why I’ve been so drawn to this particular method of strengthening myself, because it requires nothing but what you already have.
There are only two requirements for doing yoga.
1, a mat or blanket.
2, your body.
Modern corporations are trying heard to teach us that we need much more than these two things to do yoga. At a typical yoga studio you will find ropes, blocks, heated rooms, clean white towels, and other assorted gizmo-gadgets.
Have you ever picked up a yoga magazine? Stocked full of ads and stories trying to sell you more equipment.
You don’t need anything but yourself to do yoga. It doesn’t matter how skinny or fat you are, how tall, or how old you are. Anyone can do yoga, and you only need a mat.
You certainly don’t need Lululemon butt-grabber pants (though they do look quite nice) to be able to do downward facing dog properly.
All of these additional things serve to distance you from the origins of yoga, which is an incredibly simple practice.
You don’t need to buy anything else to do yoga.
If you feel like it, make a promise now to never buy anything beyond a mat for your yoga. I certainly haven’t. Some people spend thousands of dollars on yoga junk they don’t need and never manage to do any yoga. I don’t want you to be that person.
This is a guide to doing yoga by yourself without spending a dime. You won’t be asked to buy anything. There is no catch at the end asking you to give me money. My intent is only to demystify the basics of yoga enough that anyone can do it on their own for free.
A little background on my experience with yoga.
I’ve been studying yoga for around two years now. Most of my training is from Yoga to the People in Manhattan. The school promotes yoga for everyone, and is run on a donation-based payment system. I am not a certified yoga instructor, though I plan to become one when I eventually have money and time to invest in the training.
However, to offset my non-yoga-teacherness, I have an undergraduate degree in dance from New York University (I double-majored in journalism), where I studied modern dance and ballet. I’ve studied movement for over ten years, and many of the principles of yoga carry over into non-yoga forms of movement. I do feel I am qualified to instruct the fundamentals of yoga, even though I may not have the blessing of the Yoga Alliance.
Why do yoga independently?
Yoga is expensive. Individual classes can run anywhere from $12-$20 at most commercial yoga studios. To benefit the most from yoga training you need to do it regularly, and this can become expensive if you have to go to a yoga studio every time you want to take a class.
Sometimes you only need a few yoga poses or sequences to center yourself, in these cases a trip to a yoga studio isn’t practical.
By learning to do yoga on your own you will master self-discipline. You will train your body and mind to work together. A lot of people never learn how to do yoga outside of a classroom, and this is a shame, because the biggest breakthroughs in yoga can come when you’re going at you’re own pace.
The best reason to learn to do yoga independently is you will have a free way to train your body for the rest of your life. You won’t have to spend a dollar more, unless you want to.
Please be careful practicing yoga independently. Some yoga poses are incredibly difficult. Don’t force yourself into uncomfortable positions or into balances that you cannot control. The flexibility and the strength will come with time and regular practice. Forcing any stretch in yoga is counterproductive.
Yoga should never hurt you. You will feel challenged at times, but the pain of injury should be avoided at all costs. Yoga is not about torturing yourself, it is about bettering yourself.
Step 1, Find a place to do yoga.
Clear a space somewhere in the place that you live which is large enough to fit your yoga mat with at least 1 ft of space around it. I like to face a window, but that isn’t a necessity. Ideally give yourself as much space as possible, you don’t want to be worrying about knocking over a lamp or falling on your desk.
This space doesn’t need much, but it should be free of distractions and objects that you may bump in to. That is all.
Step 2, Learn a few basic yoga poses. There are hundreds of yoga posed to choose from, you probably won’t need to do them all right at this very moment. Here are five basic yoga poses that you need to know now.
Click each of these poses for pop-up images showing you the pose.
- Child’s pose. This is one of the most basic poses. Return to this pose if you ever feel overwhelmed and just breathe. It’s done by sitting on your heels with your forehead on the mat. Put your arms either in front of you or by your feet. Start your practice in child’s pose, and just notice your breathing for 15 minutes.
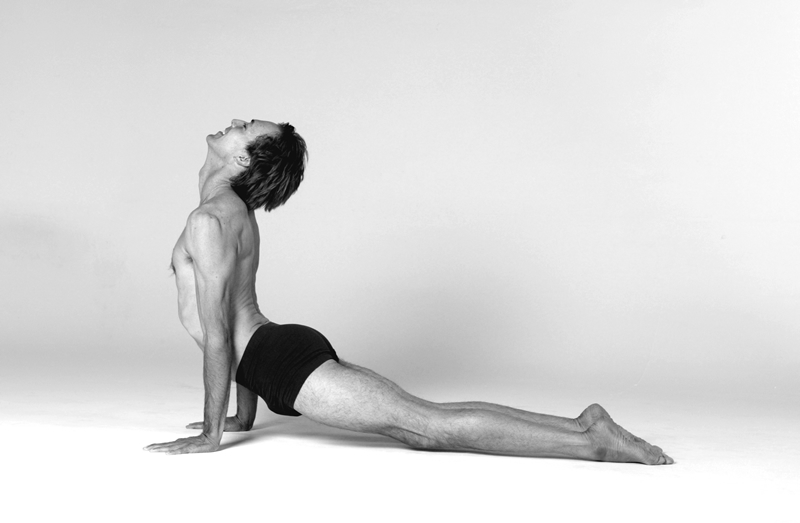
- Flow. This is the fundamental sequence in Vinyasa yoga. I’m cheating a little, as this is a series of poses that you can use to ‘reset’ yourself after every harder pose. The sequence goes like this: start in plank pose, lower to ground by bending your arms,cobra, downward dog. Do a flow between any other pose that you attempt, this will reset your body between difficult poses.
- Mountain pose. This one is easy, you do it a lot. Stand up straight, with your legs about two-fists distance apart. Reach your arms overhead with your palms facing together. Try to relax your shoulders. Now glance at the ceiling, bend forward to touch your toes and then step back into plank and ‘flow’. Repeat this 3 times or so to get your blood flowing.
- Chair pose. This is like sitting in a chair. You can enter this pose from either a toe-touching position or from mountain pose. With your arms over your head, lower your butt so that you’re sitting in an imaginary chair. Your weight should be in your heels, your butt is tucked. This pose is kind of hard, so only stay in it for 30 seconds or so. Relax and touch your toes. Flow. Repeat 3 times or until you feel like you’re going to fall over.
- Warrior 1 + warrior 2. From a downward dog, take your right leg and put it between your hands with your foot facing forward. You will be in a lung with your left foot pointing towards the side of your mat. Reach your arms over your head. This is warrior 1. Stay here for a bit, and then reach your right arm forward and your left arm back. This is warrior 2. Stay here for a bit, then put your arms on the ground, put your right leg back. Flow. Repeat on the other side.
- Shoulder stand and plow. Lying on your back, roll your feet over your head, position your arms under your lower back and reach your feet towards the sky. Ideally you should stay in this for 15 minutes, but do it as long as you feel comfortable. Then move into a plow — relax your feet over your head, take your hands and claps them behind your back if possible. Don’t flow after this baby, just skip to the next pose.
- Corpse pose. This is the last pose you do in any yoga sequence. It is done by simply lying on your back, with your legs slightly apart and your arms a few inches from your body with palms facing up. Close your eyes and rest for 15 minutes or so. The point of this pose is to completely relax your body after a strenuous workout. It is the hardest pose of all, because you must learn to relax completely.
Remember, these are only a few basic yoga poses. There are hundreds more, and you can study them online at a number of yoga sources. If you’re feeling up to it, go take a class. A good yoga resource is B.K.S Iyengar’s Light on Yoga, check it out at your local library. Many yoga studios offer free trial classes or a week of unlimited introductory classes for a small fee.
Step 3, Do minimalist yoga.
Now that you know some basic poses, it’s time to do yoga. Find yourself a room that is free of distractions. Lay out your mat or just grab a blanket if you don’t have a mat. Begin in child’s pose, and slowly move your way through the different poses that I described above.
It will probably take you thirty minutes to go from start to finish. Go slowly. Make sure you’re breathing steadily. If at any time you feel overwhelmed, return to child’s pose — this is your safe zone.